The options available in the customizer settings are explained in the given articles below.
How to manage Site Title, Logo, Tagline and Site Icon? #
1. From Customize section, go to Site Identity.
2. From Site Identity, you will be able to add various options related to site identity like:
- Logo ( Only available in WordPress versions greater than or equal to 4.5 ): It changes the main logo of the site.
- Site Title: It changes the main site title of the site.
- Tagline: It changes the tagline (i.e:Description) of the site. Just below site title.
- Site Icon: The Site Icon is used as a browser and app icon for your site. Icon must be square, and at least 512px wide and tall.
How to manage Colors? #
1. From Customize section, go to Colors.
2. In Colors Options you will see:
- Header Text Color: This changes the header text color.
- Background Color: This changes the background color of the site.
- Primary Color: This changes the primary color of the site.
- Secondary Color: This changes the secondary color of the site.
How to manage Header Images? #
1. From Customize section, go to Header Image ..
2. From Header Image Options, you will see Current Header & Suggested Options sections.
- Current header: Upload your desired header image.
If the preview is fine, click on Save and Publish to apply recently uploaded Header image. - Suggested: You can even use the suggested header image if you don’t want to uplod other image.

How to manage Background Images? #
1. From Customize section, go to Background Image.
2. In Background Image Options you will see:
- Background Image: Select the image for Background available on the media library or upload from the other location.
If the preview is fine, click on Save and Publish to apply the recently selected/uploaded image as Background Image. - Image Position: You can adjust the image position according to the arrow.
- Image Size: You will be able to choose various options from the dropdown. (Fit to screen, original ,Fill Screen) you can choose any as your requirement.
- Repeat Background Image: You can check this to repeat the background image.
- Scroll with Page: You can check this option to scroll the image with the page.

How to create a Menu? #
1. From Customize section, go to Menus.
2. From Menus, click “Add a Menu” button and you will be able to create a menu.
3. Now, click Add Items and you will be able to Add or Remove Menu Items according to your requirement.
4. Select the Menu locations.
5. If the preview looks fine, save the changes by clicking on Save and publish button.

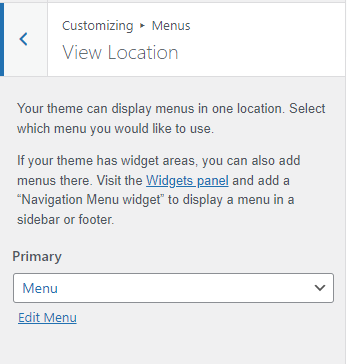
How to change Menu Locations? #
1. From Customize section, go to Menus and inside it you will find Menu Locations.
2. Here you can:
- Select the menu for Primary Menu. Primary menu appears as a main menu in the header section.
3. If the preview looks fine, save the changes by clicking on Save and Publish button.
How to add Widgets? #
1. From Customize section, go to Widgets.
2. From Widgets, you will see different sections to add widgets where you will be able to Add a Widget or Remove widgets by going to a particular widget section.
3. And the added widget will be displayed in a particular section that you have added.

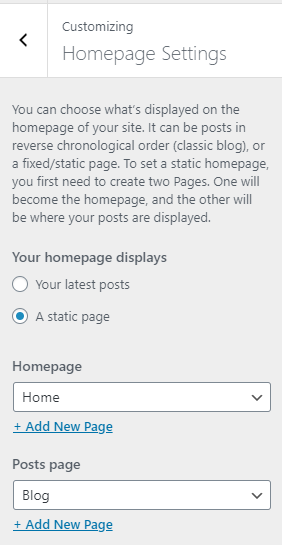
How to change Homepage Settings? #
1. From Customize section, go to Homepage Settings and inside it you will see two option.
2. Here you can:
- Your latest posts: When you choose this option, the latest posts you have created will display on homepage
- A static page: You will be able to set a page as FrontPage and you will find the Post Page option as well.
- Homepage: You can set any page as a Homepage.
- Posts Page: You can set any page as Blog.